
What Are the Top Types of Coax Tools?
Coaxial cable work can look simple until a connector slips, a braid gets nicked, or a signal drops after installation. The right coax tools help prevent these problems, but each tool has a specific job. A cable stripper prepares the layers to consistent lengths, while a coax cutter makes a clean, square end. Small details matter. Even a slight jacket tear can expose the shielding or make a connector fit poorly.
This guide introduces the main types of coax tools and explains where each one is useful. Compression tools secure compatible connectors by pressing them onto the cable, while crimpers work with connectors designed for crimping. They are not interchangeable. A coax tester can check continuity and reveal basic wiring faults, though it cannot diagnose every signal problem. For a tidy installation, installers may also use a cable mapper, adjustable wrench, or connector-preparation tool. The exact kit depends on cable size, connector type, and the work environment. Check tool compatibility before buying, and follow the connector maker’s preparation instructions. That step is easy to overlook. Some jobs also expose a practical limitation: a tool can make repeatable connections, but it cannot correct damaged cable or a poor installation plan. With those distinctions in mind, readers can compare the top coax tools by function, suitability, and the quality of connection they help produce.
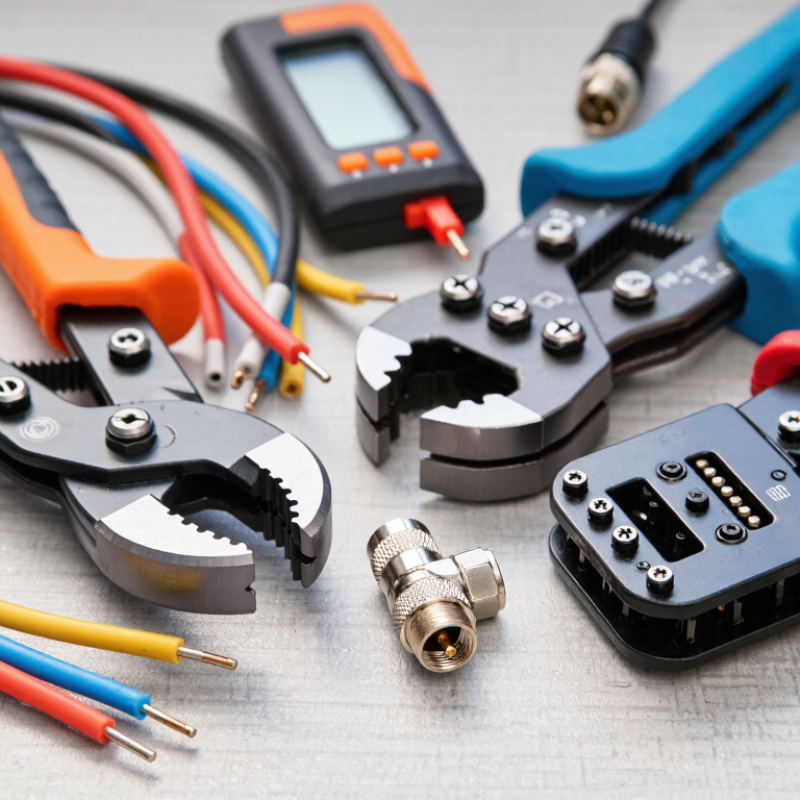
Coaxial Cable Cutters for Clean, Precise Ends
What Are the Top Types of Coax Tools?
Coaxial cable cutters create clean, square ends before stripping or connector installation. That small step affects signal quality. A crushed jacket can distort the dielectric and expose the shielding. In field work, a sharp shear cutter usually performs better than a general-purpose blade. It closes evenly and leaves fewer flattened strands. Rotary cutters suit repeated production work, while ratcheting cutters help maintain consistent pressure on thicker cables. Choose carefully.
MarketsandMarkets projects the coaxial cable market to grow from about USD 31.6 billion in 2023 to USD 40.6 billion by 2028. More installed cable means more terminations, repairs, and quality checks. A professional cutter should match the cable diameter, including RG6, RG11, or larger hard-line types. The handle should remain stable with wet or gloved hands. A slipping tool can leave a jagged edge. That is not merely inconvenient.
After cutting, inspect the end under bright light. The braid should remain undisturbed, and the center conductor should stay straight. ANSI/TIA-568.4-D guidance emphasizes controlled coaxial installation and termination practices. Industry testing reports also link poor connector preparation with higher return loss and intermittent faults. I have seen technicians rush this step. The connector looked secure, yet the picture broke during movement. Better tools reduce that risk, but they do not replace inspection. Sometimes, the cut still needs repeating.
Coaxial Cable Strippers for Layered Insulation Removal
Coaxial cable strippers are essential tools for removing layered insulation cleanly. They prepare the jacket, shielding, dielectric, and center conductor in controlled steps. In practical cable work, a sharp, adjustable stripper saves time and reduces conductor damage. A poor cut can weaken the connection before installation even begins.
Experienced technicians choose strippers based on cable size and layer design. Some models remove the outer jacket and dielectric in one motion. Others use separate blades for greater control. Adjustable depth matters because coaxial cables often have different jacket thicknesses. The blade should stop before touching the braided shield or copper core. I still occasionally find a cable with a slightly uneven cut. That reminds me to inspect every layer, rather than trusting the tool completely.
Tips: Measure the cable before stripping. Rotate the tool slowly and evenly. Avoid squeezing too hard. Check for nicked braid strands or a scratched center conductor. Remove loose insulation with clean fingers or a small approved tool. Keep blades dry and replace them when cuts become rough. A test connector can reveal mistakes early, especially when signal loss or poor shielding is difficult to diagnose. Short practice pieces help, too. Mistakes happen. Careful inspection remains the most reliable step.
| Tool Type | Primary Function | What It Works On | Key Selection Detail | Typical Use |
|---|---|---|---|---|
| Coaxial Cable Stripper | Removes selected sections of the outer jacket and dielectric insulation to expose the braid and center conductor. | Layered coaxial cable constructions, including jacket, shield, dielectric, and center conductor. | Choose a tool compatible with the cable diameter and construction. Blade settings or cartridges must match the cable and connector preparation dimensions. | Preparing cable ends for connectors while helping avoid nicking the conductor or leaving excess dielectric. |
| Rotary Coaxial Cable Stripper | Uses rotating blades to make controlled cuts around the cable circumference and at set distances from its end. | Outer jacket and dielectric layers on compatible coaxial cable sizes. | Check the tool’s supported cable sizes and cut-depth adjustment. Incorrect depth can damage the braid or center conductor. | Repeated, consistent cable-end preparation in installation or assembly work. |
| Adjustable Coaxial Stripper | Allows blade positions or cut depth to be adjusted for different cable constructions. | Selected coaxial cables with varying jacket thicknesses or preparation requirements. | Follow the cable and connector specifications; test the setting on a cable offcut before preparing finished lengths. | Work involving more than one compatible cable type or a need to fine-tune strip length. |
| Coaxial Cable Cutter | Makes a clean, square cut across the cable before stripping and connector installation. | Coaxial cable, with the cutting capacity depending on the cutter design. | Use a cutter rated for the cable diameter. Avoid crushing or deforming the cable during the cut. | Creating a neat cable end before using a stripper or attaching a connector. |
| Compression Tool | Compresses a compatible compression connector onto prepared coaxial cable. | Connector bodies designed for compression and the cable types specified for those connectors. | Match the tool’s adapter or plunger and travel to the connector design; verify the connector is fully seated. | Installing compression-style connectors for television, satellite, or data cabling. |
| Coaxial Crimping Tool | Crimps a connector ferrule or sleeve around the cable or connector body. | Crimp-style coaxial connectors and compatible cable sizes. | Select the correct die profile and size for the connector ferrule; compression and crimp connectors require different tools. | Attaching crimp-style connectors when that connector method is specified. |
| Coaxial Connector Torque Wrench | Tightens threaded coaxial connectors to a specified torque. | Threaded connectors that require controlled tightening, such as certain RF connections. | Use the torque value and wrench size specified for the connector; do not substitute a torque wrench for a connector installation tool. | Reducing the risk of loose connections or damage from overtightening in RF assemblies. |
| Coaxial Cable Tester | Checks cable continuity and, depending on the tester, identifies opens, shorts, or wiring faults. | Completed coaxial cable runs with compatible connectors. | Confirm that the tester supports the connector type and the checks needed; continuity testing does not measure every signal-performance characteristic. | Basic verification of cable runs after connector installation. |
Crimping and Compression Tools for Connector Attachment
Crimping and compression tools are among the most useful coaxial cable tools. They attach connectors securely after the cable has been prepared correctly. A crimping tool squeezes a metal sleeve around the cable jacket. Its die must match the connector and cable size. A poor match can crush the dielectric or leave the connector loose.
Compression tools work differently. They press the connector sleeve along the cable, creating even pressure around the jacket. This often provides strong pull resistance and reliable sealing in outdoor installations. I have found that careful cable preparation matters more than hand strength. Strip the jacket to the specified length. Keep the braided shield neat. Avoid cutting into the center conductor.
Tips: Check the connector instructions before choosing a die. Make clean, square cuts. Slide the connector fully into place. Confirm that the center conductor reaches the contact. After crimping or compression, perform a gentle pull test. A connector that moves needs attention. Use a continuity tester when possible.
Even experienced installers make mistakes. I once trusted a connector that looked perfect but failed under movement. Visual inspection alone can miss a weak connection. Inspect the ferrule, shield, and exposed conductor under good lighting. Replace damaged connectors instead of forcing them into service. Correct tool pressure, compatible materials, and repeatable technique produce more dependable coaxial connections.
What Are the Top Types of Coax Tools? — Crimping and Compression Tools for Connector Attachment
Typical coaxial cable workflow: prepare the cable, attach the connector with the matching tool, then check the finished connection. Crimp and compression tools are designed for different connector styles and are not interchangeable.
Stage index indicates workflow order, not tool performance: 1 = preparation, 2 = connector attachment, 3 = connection check. Always match the tool to the connector and cable specifications.
Connector Preparation Tools for Reliable Cable Termination
What Are the Top Types of Coax Tools?
Connector preparation starts with a clean, square cable cut. A coaxial cable cutter helps prevent crushed ends that can complicate stripping. A rotary coax stripper removes the outer jacket and dielectric to set lengths. Small details matter. Use a tool matched to the cable type and connector dimensions.
During stripping, avoid nicking the center conductor or pulling away too much braid. Even a tiny cut can weaken the connection or expose the shield unevenly. Check that the foil and braid remain arranged as the connector instructions require. Not every cut is clean. If the end looks ragged, recut it rather than forcing the connector into place. That extra step can save a frustrating re-termination.
After preparation, inspect the exposed layers under good light. The conductor should be straight, and the dielectric should not be crushed or melted. A compression tool then secures a compatible connector evenly; it does not correct poor preparation. Connector designs vary, so follow their specified strip lengths instead of relying on a universal setting. In practice, a quick visual check is easy to skip when work is rushed, but it often catches faults before installation.
Coaxial Cable Testers for Checking Signal Continuity
Coaxial cable testers are useful for checking whether a cable’s center conductor and shield form an unbroken path. A continuity tester sends a small electrical signal through the cable and indicates an open circuit or short. It can quickly identify a loose connector, a crushed section, or an incorrectly fitted termination. A beep is reassuring. But it does not prove that the cable carries a clean signal.
That distinction matters in modern networks. DOCSIS 3.1 specifications support downstream frequencies up to about 1.2 GHz, so damage or poor connections may cause problems even when continuity passes. For a fuller check, technicians can use a coaxial signal-level meter to measure signal strength and, where supported, return loss. Test at both ends, with connected equipment safely disconnected. Record readings and cable locations; this simple habit makes intermittent faults easier to trace. I have seen continuity checks treated as a final verdict. They are only one part of the diagnosis.
Tips: Inspect connector pins for bending, then test the cable end to end. If the tester passes but service remains unstable, check signal levels and connectors. A basic continuity tool cannot measure frequency response.
Related Posts
-
China Top Coax Tools Guide for Professionals and DIY Enthusiasts?
-
Best Coax Tools for Global Buyers in 2026?
-
Why You Should Use Coax Tools for Better Cable Management and Performance
-
Top 5 Coax Tools Buyers Need to Know About?
-
Best Fiber Optic Termination Techniques for Global Buyers?
-
How to Use Fiber Patch for Enhanced Connectivity and Performance?